Online Working: Further Information
Hello and welcome. Working from life face-to-face is, of course, ideal for learning sculpture. But for one reason or another, that just may not be possible. Online working is a different experience but has some real advantages too. One major upside is that you can take part in my online sculpture courses or mentoring sessions from your own home or studio anywhere in the world! (Provided you have a reasonably good internet connection.)
The following guidance notes will tell you a bit about what to expect and also what you’ll need to have to hand if you decide to give it a go.
Duration, Content and Skill Level
Mentoring:
Mentoring sessions are designed for more experienced students and tailored to each individual. Skip to Space, Materials and Equipment below if you want to find out what to expect and how to prepare for mentoring.
3-Day Courses:
The courses are designed to enable students to make good progress on completing a portrait in clay during three day-long zoom sessions. Eeach 10 till 4.30 session will involve a manageable balance between group/one-to-one contact and time getting on by yourself. So don’t worry about screen time – you shouldn’t feel zoomed out by the end of the session. Typically, teaching days are Monday, Wednesday and Friday – leaving Tuesday and Thursday to work on or catch up if you need/want to ( or not – sometimes it’s best just to take a break).
It’s important to appreciate that working online wholly or partially from photographs and/or drawings involves adding an additional skill set to your existing observational skills. It’s much harder than working from life because photos just don’t give you sufficient 3D information. You’ll need to rely on imagination, memory, and reference material in order to translate unreliable 2-dimensional information into usable and reliable information for working in the round. I’m aiming to equip you with some techniques to do that and I have devised a step-by step method you can follow on my courses and beyond. Of course, I can’t provide you with the ‘muscle memory’ that is acquired through repeated, focused looking – and that’s why I recommend that, ideally, you have some previous experience with either two or three-dimensional observational work before undertaking online sculpture courses.
Space, Materials and Equipment
So, what are you going to need to get started? One of the main things you’ll need is a dedicated space where you can make a bit of a mess. I think it’s possible to work in a fairly small space, provided you can be quite organised. I find a standard wooden kitchen trolley indispensable in my studio. With a table-stand or even just a sturdy wooden box screwed to the top, the trolley can provide a working surface at the right height for standing up to work, as well as somewhere to put all your tools and materials. And you can keep anything else you need like reference material, etc., on the lower shelves. Then at the end of the day you can just wheel it into a corner. (However, if you’re not able to work standing up a sturdy table that you can get your legs under would be better).
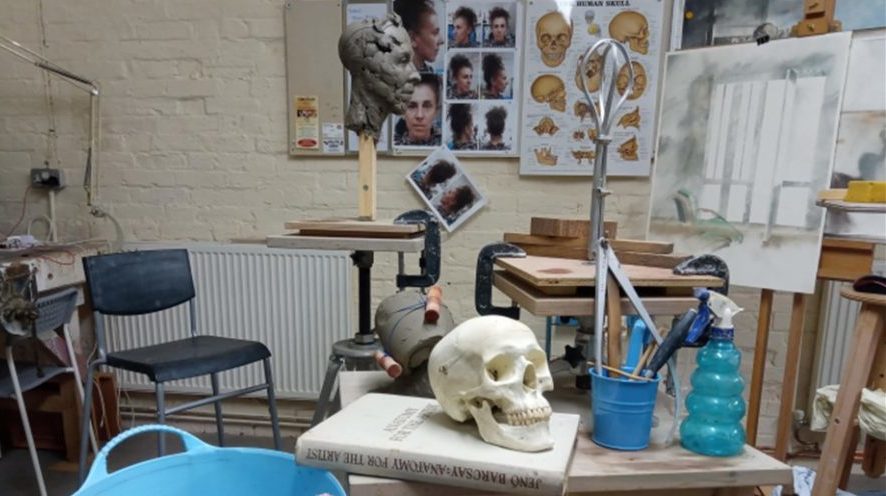
I get most of my tools, equipment and materials delivered by a specialist sculpture supplier. But you can also make some of the things you’ll need yourself. One essential is an armature. I’m sure many of you will have a favourite type of armature that you like to start with. You may be familiar with the ready-made one from Alec Tiranti. I’ve made several versions myself and a prototype (yet to be tested) is pictured in the clickable image for this post. But the main thing, whatever armature you use, is to make sure its sturdy and safely secured to the surface you’ll be working on.
Materials, Tools and Equipment
Here is a list of essential and recommended materials, tools and equipment needed for most courses (starred items are strongly recommended but you can just about do without them). I have included links to the Alec Tiranti website for illustration. Of course, there are many other sources worldwide.
- A suitable space and surface for comfortable working – ideally a proper sculpture stand* or a trolley* with a rotating stand* fixed to the top. (Please refer to the notes above. If you choose the trolley option, make sure the stand is in the corner of the trolley top as illustrated – so you don’t have to bend or reach awkwardly.)
- Calipers* for measuring.
- Small wooden clay modelling tools. (You can do just about everything you need to do with a K05, K10, T8 and a 453 stainless steel leaf and spear tool. Alternatively, you can just use your hands and an off-cut of wood as 4. below.)
- An off-cut of, say, 50x20x300mm sawn wood for smacking the clay around (as one does). I like to saw one end to a roughly 45° angle. I also can’t do without a short piece of planed timber, say 25x25x125mm, sawn one end to an acute angle (pictured in the clickable image for this post). The square end is handy for lightly consolidating clay and the angled end is a great modelling aid.
- An armature. (see notes above). If you choose to buy Tiranti’s ready-made components (modelling board, bust-peg, aluminium wire and 2x jubilee clips)– you’ll also need an adjustable spanner, wire cutters and a flat headed screw driver to assemble these components.
- Two 100mm ‘G’ clamps to secure the base board of your armature to your stand, if you have one.
- Minimum 10Kg water-based, ordinary grey clay or other preferred modelling clay.
- A spray bottle for moistening your work.
- Access to water.
- A supply of corrugated and lined craft board or equivalent discarded packaging that can be readily cut with scissors – and will hold its shape/rigidity. (Essential for the first day of some courses)
- A small utility kitchen knife for marking out your clay work.
- Drawing materials, including minimum A4 drawing paper and A4 tracing paper (Essential for the first day of some courses.)
- Access to a printer to print out photographs of your subject and the templates required on some courses.
- A replica skull* (virtual models are available but not anywhere near as useful).
- An anatomy book* (Illustrative material can also be accessed virtually)
If you do decide to join one of my online courses, I’ll be sending out additional information and material for printing out well in advance of the start date. And there will be further digital ‘hand outs’ provided before and during the course. Please feel free to get in touch if you have any any questions.
